|
|
|
info@grayfoximages.com |
|
With lenses, quality matters. And yet, experience suggests that there are many marginal lenses out there as well as an wide range of sample-to-sample variations -- even in the more expensive lines. As a result, it is a good idea to test new lenses upon acquisition. For me, the primary purpose of such testing is to insure that a product meets expectations while there is still time to return it for a refund or exchange. It is also helpful to have some idea of what to expect from a lens even if it is not defective. Because I want to know what I've got, I test every new lens as soon as it arrives. This essay provides the details of my testing approach. In summary form, here are the steps involved.
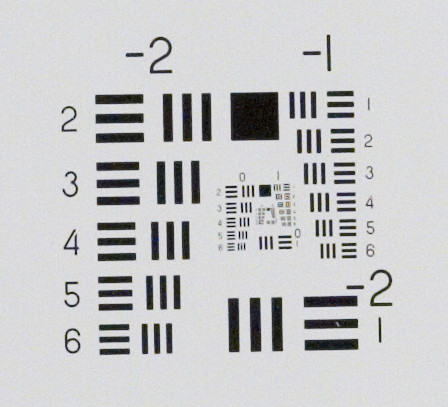
What to Test Many factors impact the performance of a lens, including resolution, contrast, color rendition, distortion, flare, vignetting, spherical and chromatic aberration, speed and accuracy of focus (if autofocus), and others. To reliably produce quantitative measurements for all of these attributes requires the resources of a well-equipped and well-staffed optical laboratory -- far beyond the resources available to a user who just wants to know if a lens just purchased is acceptable. Prior to purchase, I consult as many published tests as possible, a number of which are listed on the Links page. Once a new lens is in hand, however, I want to know how my lens performs. With limited resources, what I can do is test certain critical aspects of the new lens, such as resolution, to find out whether I've gotten a "lemon" or a good one. To conduct my own resolution tests I use a commercial resolution test chart. Such testing can provide resolution data across the entire field of view and qualitative information on distortion and vignetting (light fall-off in the corners). Other test targets with fine detail, such as a newspaper, paper currency or a brick wall, can be used effectively. But, resolution test charts have the advantage of providing repeatable quantitative data. Test Charts There are several good resolution test charts out there. the standard these days is the ISO 12233 resolution chart. However, it runs to the hundreds of dollars. Edmund Optics sells a chart based on the US Air Force 1951 test pattern for a very reasonable price that will suffice for quantitative testing resolution and for showing qualitiatively how lens distortion and vignetting impact image formation. A full size image of the chart is shown below. Clicking on the image will open a large 3.5 MB 100% scale JPEG made from the original converted RAW file. 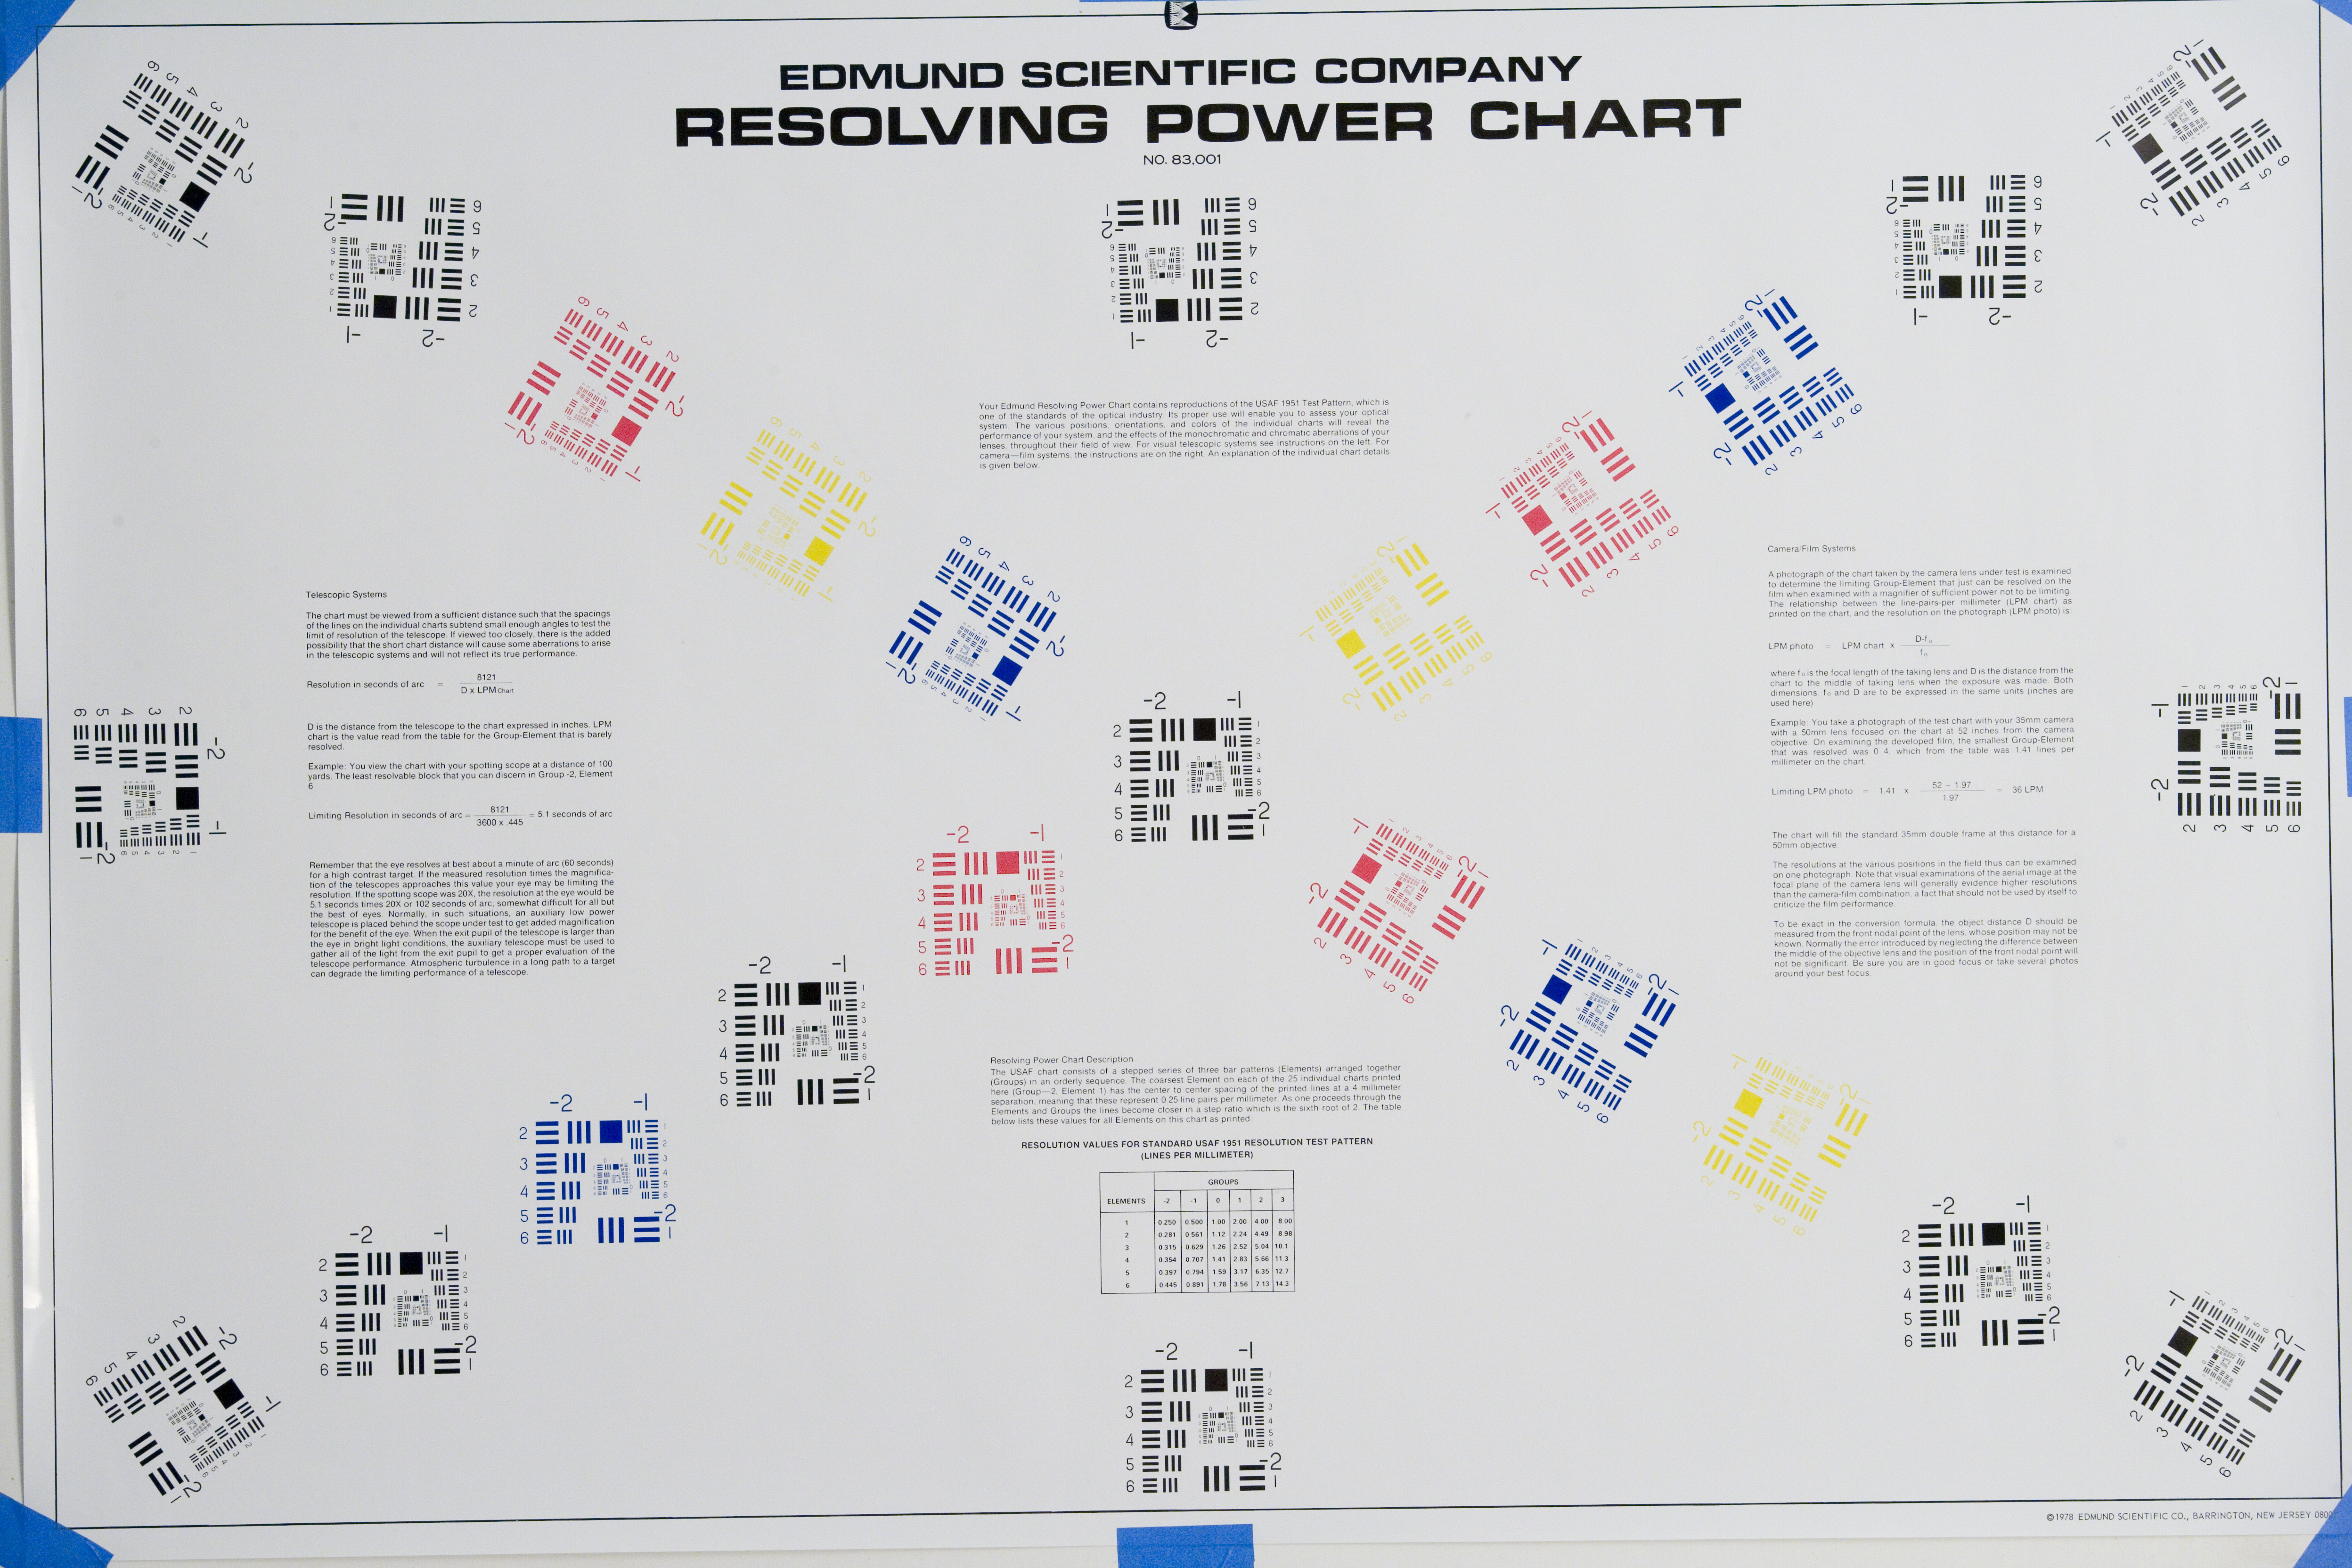 Physical Test Setup The first requirement is a vertical wall on which to install the test chart and a room, preferably long enough to view the entire chart in the viewfinder. The chart provides a formula for calculating resolution in line pairs per millimeter (lp/mm) takes into account the actual distance employed, even if the entire chart does not fit in the viewfinder. Accurately aligning the camera and lens to the test target is critical. The film or sensor plane must be centered on the test target and aligned as close to exactly parallel to the target as possible. Otherwise, parts of the image, especially the edges and corners, will appear to be blurred when in fact the lens is capable of resolving that part of the chart. A small mirror taped to the center of the test target helps with alignment. When the reflection of the lens is seen in the mirror, the system is aligned. Finally, there is the matter of lighting.
All other things being equal, it is better to maintain a fast
shutter speed during testing to minimize the impact of any small
vibration introduced by slow shutter speeds. An indirect flash setup, preferably involving multiple
flashes with diffusers, umbrellas or bounce flash placed off-axis
from the camera is recommended. Mirror lockup and self timer delay is recommended for shutter release
in conjunction with a remote
release. Weighting the tripod with a beanbag helps to minimize
vibrations too.
Also, unless you specifically want to test the effectiveness
of tripod-based image stabilization, turn off IS or VR or whatever
the manufacturer calls their system. Conducting the Test and Interpreting the Result I capture test images
in RAW, with the consequence that images must be run through
a raw converter in order to be interpreted. I white balance the
image and adjust exposure if it is off before proceeding. Dispute
may arise over how much sharpening should be done. I sharpen according to my
normal workflow because I want to know the performance of the lens as I
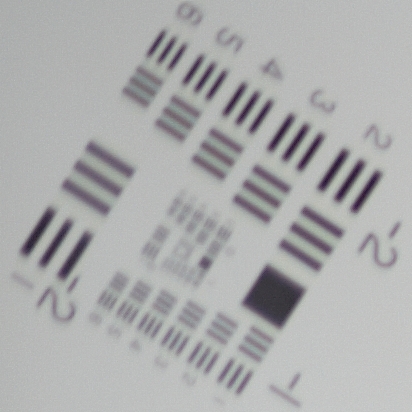
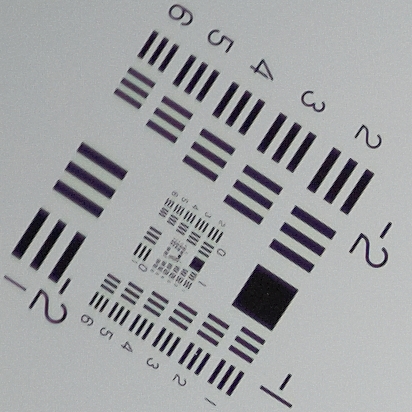
would normally process the file. But this is a matter of individual choice. The resultant images should be zoomed to 100% actual pixels and examined closely. in order to fully assess the fine detail in the test patterns. A crop of the central test block from the USAF 1951 test image shown above is illustrated at right. The next step is to estimate which test group contains the most closely spaced set of bars that is resolved. For the example shown, all three bars for each orientation can just be discerned for the test group labeled (1,2). This information is used in conjunction with the directions and the formula printed on the test chart to convert the information into a numerical line pairs per millimeter value. For this lens and this test, center resolution works out to be 58 LPPM. If the next test group, (1,3) could be resolved (although it isn't, quite) then the resolution would be 61 LPPM. This may seem low, and in fact the lens will likely perform at a higher level. In this case, the quality of the lens is limited by the sensor and its anti-aliasing filter. This will be discussed in the next section. Test patterns are arranged all around the chart so one can gather data about the edges and corners of the lens as well as at the center. Avoid counting line groups that appear sharp but that are actually aliased artifacts -- a result of the finite size of the sensor's pixel spacing. In such cases, the lens can resolve more detail than the sensor, but it is not possible to determine how much more. Note that this process necessarily involves some degree of personal judgement. Error Sources and System Considerations It should be noted that the testing described above does not, in fact, test the lens in isolation. Tests such as these are necessarily through-the-system tests as well as indicative of the quality of the test setup and execution. The test includes the camera and its sensor as well as the lens -- and the conversion software if one shoots RAW. For digital cameras the sensor photosite spacing is a resolution limiting factor when testing an excellent quality lens. It is also difficult to separate lens performance from errors introduced by the test setup and execution. In addition to any errors introduced by failure to perfectly square up the camera, the test also carries forward any errors introduced by the focusing process, whether manual or autofocus. Even camera shake can be a factor if care is not taken via mirror lockup and a steady support platform. For this reason, if the initial test shows problems with a lens, it is a good idea to retest from a fresh setup to insure that the first test yielded valid results. Note that even if one uses an ad hoc target rather than a formal one the above setup precautions and caveats still apply. One unavoidable shortcoming of the above is that the
test is performed at a single distance. However, lenses do not perform identically at all subject distances.
Therefore,
to be thorough a lens test should evaluate the lens at various
subject distances. Whether this is actually done is at the discretion
of the individual. Testing each new lens is well worthwhile. It can save you from getting stuck with a lemon. A few years ago I bought a Canon 85mm f/1.8 lens. When I tested it the corner resolution at f/1.8 was less than 20 LPPM -- quality so abysmal as to hardly be believed! Needless to say, it went back. A few years later I tried again and the second copy produced excellent test results, virtually the equivalent of my outstanding 100mm f/2.8 macro in the center and good in the corners once stopped down a couple of stops. Likewise, I had to exchange a 24-105mm f/4 L IS zoom lens because of misaligned internal elements that caused one edge to be blurred while the rest of the field was sharp.
The point is that a simple in-home test that takes only a few minutes and costs little or nothing can save one from expensive mistakes. © 2013 Michael W. Masters Return to top |
||||||
 |