|
|
|
info@grayfoximages.com |
|
If one enjoys making panoramas, thoughts may eventually turn to the more complex end of the spectrum, namely spherical panoramas, that is, 360 x 180 degrees of coverage. Such undertakings are best done with specialized (and expensive) gear. However, as a budgetary expedient, we attempt herein to adapt bird photography and landscape gear already on hand to the task as a way of getting started and gaining experience. First, a brief example of a linear 360 degree panorama, and then on to the spherical version. While it is possible to create normal panoramas hand held if one is very careful, even for this type of panorama tripod-based capture is much more likely to produce error free stitching results. In such cases, most any tripod head will work, so long as it can be leveled properly. The example below, a full 360 degree panorama produced from fifteen sets of five bracketed images, was produced on a standard tripod with a popular brand of ball head. Only one stitching error can be seen, and not only is it insignificant but it could be easily removed in post-production.
The details are as follows. Bracket captures were made using manual exposure, with fixed aperture and ISO, allowing shutter speed to vary between images within the bracket. Bracket exposure interval was one stop, resulting in a range of -2, -1, 0, +1, +2 vs metered exposure in the bracket set. Each bracket set was processed with HDR software into a single HDR image. The fifteen HDR images were then spliced together with a panorama stitching program. The final scrollable 360 degree result was produced by virtual image software. Gear and post processing software details include:
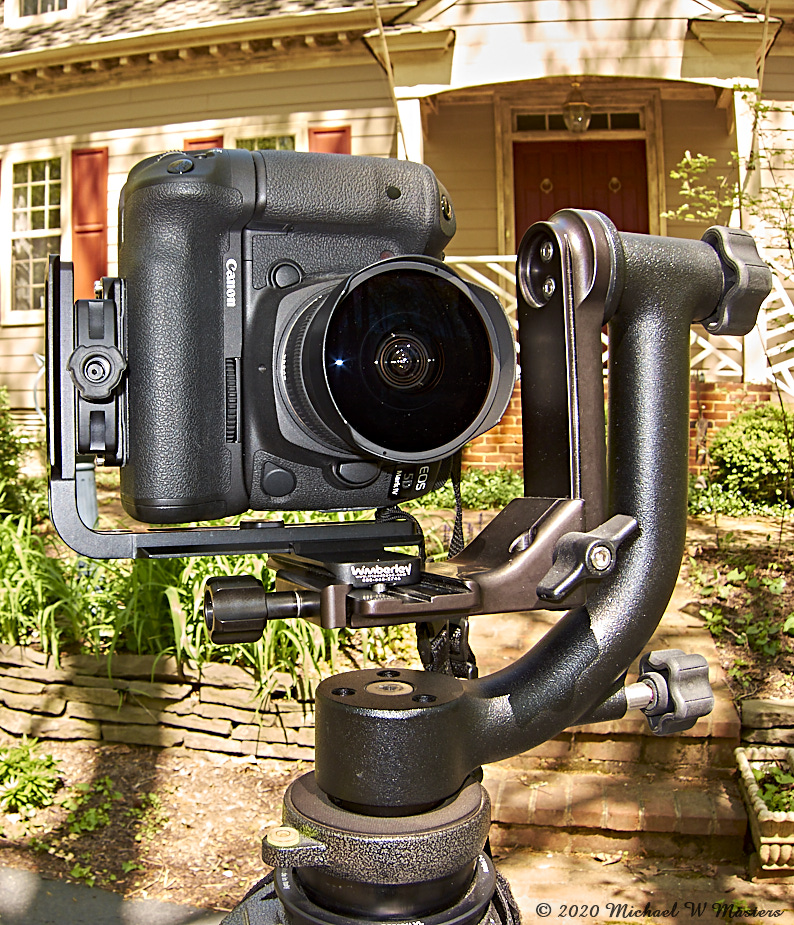
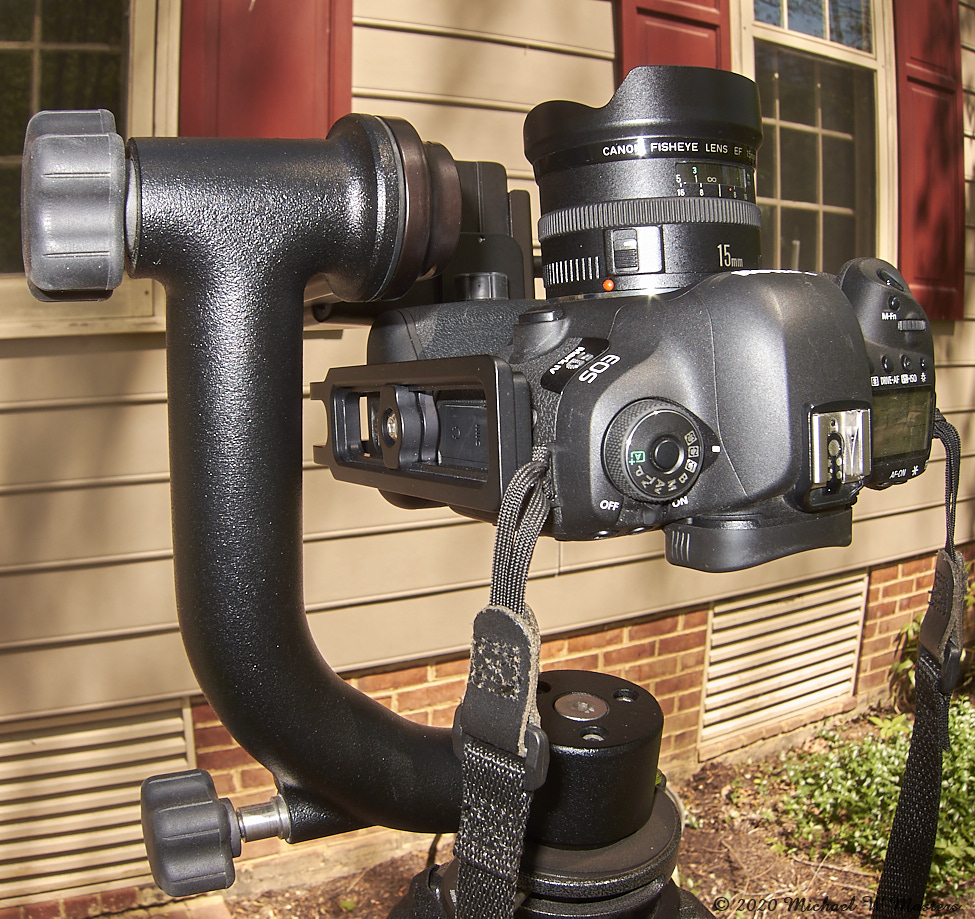
This setup works well for single row panoramas, and even limited multirow panoramas. But, it needs augmentation for full spherical panoramas. The problem in the latter case is how to capture the nadir (straight down) and zenith (overhead) views. In order to do so, a specialized tripod head is required that allows the camera to be rotated up and down, as well as panned horizontally, so that it points to zenith -- and straight down if a view of the tripod or other support mechanism is desired. These can vary from inexpensive, light-load affairs that cost less than $100 to highly refined motorized drive units that retail for ten times as much. Adapting a gimbal head for spherical panoramas But, is there a way to circumvent the need for dedicated spherical panorama gear? Probably not for the highest quality and most refined undertakings. But, if you are a bird photographer possessed of a gimbal head for long lens support, there just might be a way to get started without breaking the bank. With the appropriate mounting accessories, a camera can be pointed to the zenith position. Nadir is also accessible, although the tripod or other support is not particularly interesting.
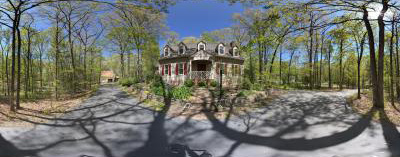
We have given this setup a try, and it works sufficiently well, as the panorama below illustrates, to serve as a useful tool for those who are interested in getting started in spherical panoramas. Of course, for a high quality full spherical gigabit panorama, those specialized tripod heads are still a requirement. But for lesser duty, the ad hoc setup shown can produce satisfactory results if display of a very large and high resolution image is not the final goal. The full gear setup appears in the list below:
The image below illustrates the result that can be achieved with such a setup. As with the 360 degree single row panorama above, manual exposure with fixed aperture and ISO were used, and since only a single image was captured in each direction, shutter speed was held constant as well.
Results and Summary Our first experiment with a spherical panorama consisted of only five fisheye lens images captured hand-held, four horizontals at the four cardinal points, and one zenith image. The result was a flawed product, with many noticable stitching errors, a void in coverage in the overhead exposure, and inability to get close to the nadir point. Further, resolution of the resulting image was limited due to the use of only five images, to the fact that a camera with only a 20MP sensor was employed, and to the indifferent resolution of the particular fisheye lens used. That led to expermenting with the tripod-based setup, as well as inclusion of more images and a higher resolution camera, at 30MP, with the results shown above. There are only a couple of clearly visible stitching errors, and while there may be more, any that are present are undetectible with so much small detail in the image. On the other hand, the zenith view was completely captured, And, the cutout at nadir was small enough so that the feet of the tripod legs were revealed. This mean that the fisheye lens used in vertical orientation captured as much of the nadir as was useful.
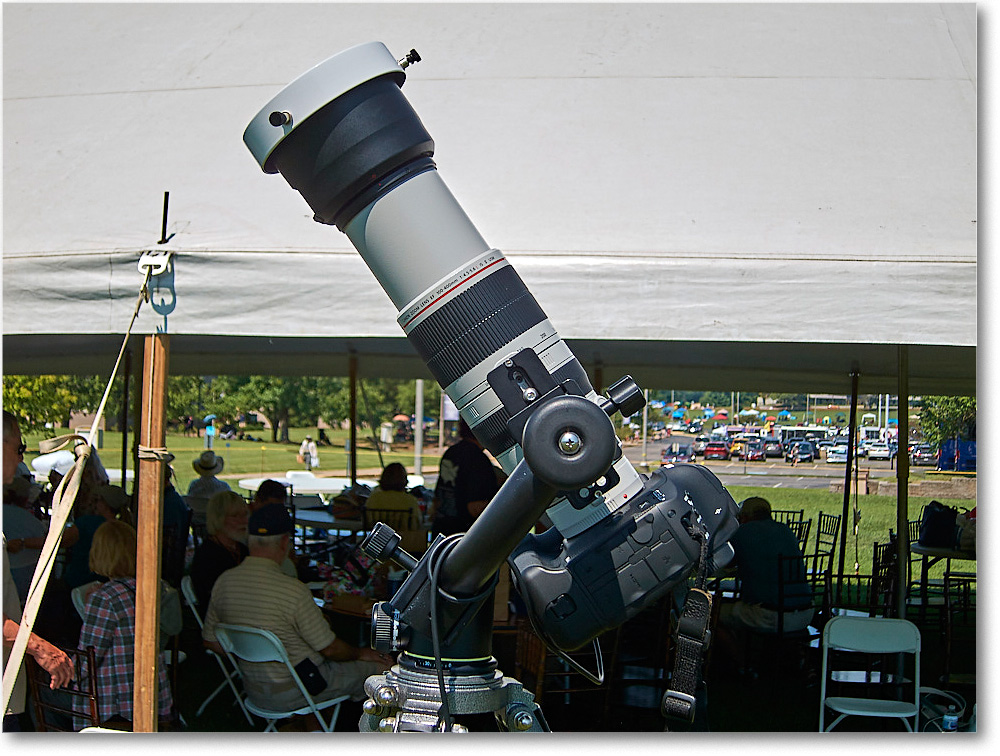
In summary, this technique appears viable for small scale spherical panoramas taken with a fisheye lens. One might try lenses other than a fisheye, but due to the small range of nodal point adjustment it would have to be a short barrel lens, possibly a compact wide angle prime. As an aside, a gimbal head can also be pressed into service as an ad hoc equatorial telephoto/telescope mount. The image at right shows this arrangement in use to photograph the 2017 solar eclipse. To achieve equatorial tracking, the gimbal head is tilted back to reflect latitude rather than used in the normal horizontal position. Footnote: for other Gray Fox Images panoramas, visit our Panoramas page.
|
||||||||||
 |